
Creating a timeline in PowerPoint is one of the most effective ways to tell a story or visualize a sequence of events. Whether you’re planning a project, explaining historical milestones, or pitching your company’s growth to investors, a well-crafted timeline can make your presentation stand out.
In this comprehensive tutorial, we’ll walk you through how to make a timeline in PowerPoint with simple, beginner-friendly steps. We’ll also share a unique custom design method using tables and icons for those who want to go beyond the default SmartArt look.
Why Use a Timeline in PowerPoint?
Timelines make complex information easier to digest. Instead of overwhelming your audience with blocks of text, you can display events or milestones visually, making your story more memorable.
Common use cases include:
-
Project roadmaps – Deadlines, sprints, and phases.
-
Company milestones – Growth charts, investor presentations.
-
Historical events – Chronological storytelling.
-
Event planning – From preparation to execution.
Step 1: How to Insert a Timeline in PowerPoint (SmartArt)
The simplest way to create a timeline is with SmartArt graphics.
1. Go to Insert → SmartArt

Open PowerPoint and click the Insert tab on the top menu. Select SmartArt to open the gallery of diagram options.
2. Choose Basic Timeline

In the pop-up, go to Process → Basic Timeline and click OK.
3. Add Your Events

A Text Pane will appear on the left side. Enter each milestone (e.g., “2025 – Product Launch,” “2026 – Marketing Campaign”).
Step 2: Customize Your Timeline
The default SmartArt design can look generic. Here’s how to give it a polished look:
-
Change Colors: Go to SmartArt Design → Change Colors and pick a theme.

-
Adjust Fonts: Use bold fonts for key milestones. Increase size for better readability.
-
Reorder Elements: Drag and drop milestones inside the text pane.
Step 3: Animate Your Timeline
Animations add a storytelling effect to your slide.
1. Convert to Shapes
Select your timeline → SmartArt Design → Convert → Convert to Shapes.
2. Ungroup Shapes
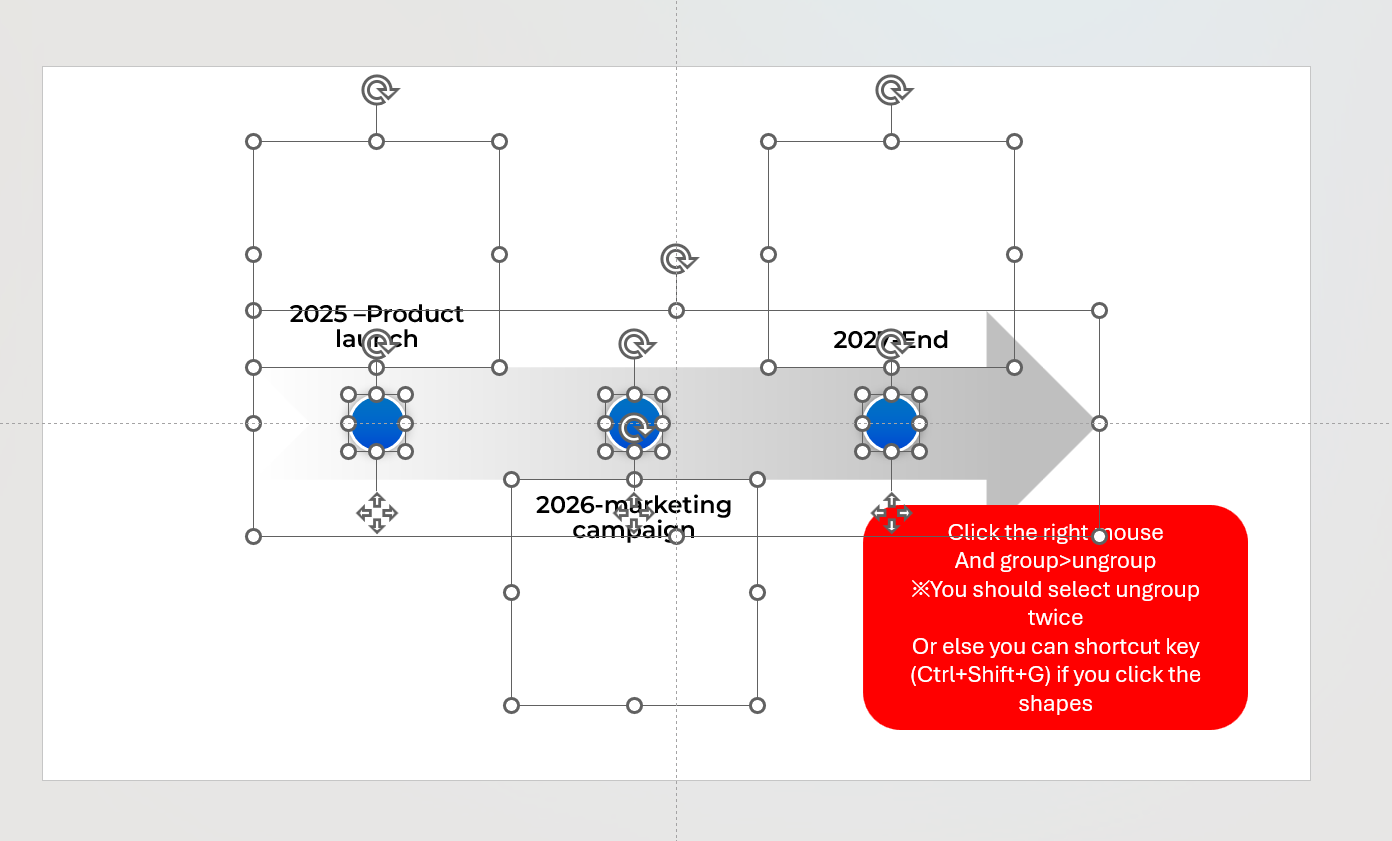
Right-click and choose Group → Ungroup to animate individual elements.
3. Apply Animation Effects

Go to Animations → Fade, Wipe, or Fly In.
4. Sequence Your Animation
In Animation Pane, select Start: After Previous for a smooth flow.
Step 4: Create a Custom Timeline Without SmartArt (Pro Tip)
If you want a clean, modern design, SmartArt might feel limiting. Here’s how to create a fully custom timeline:
-
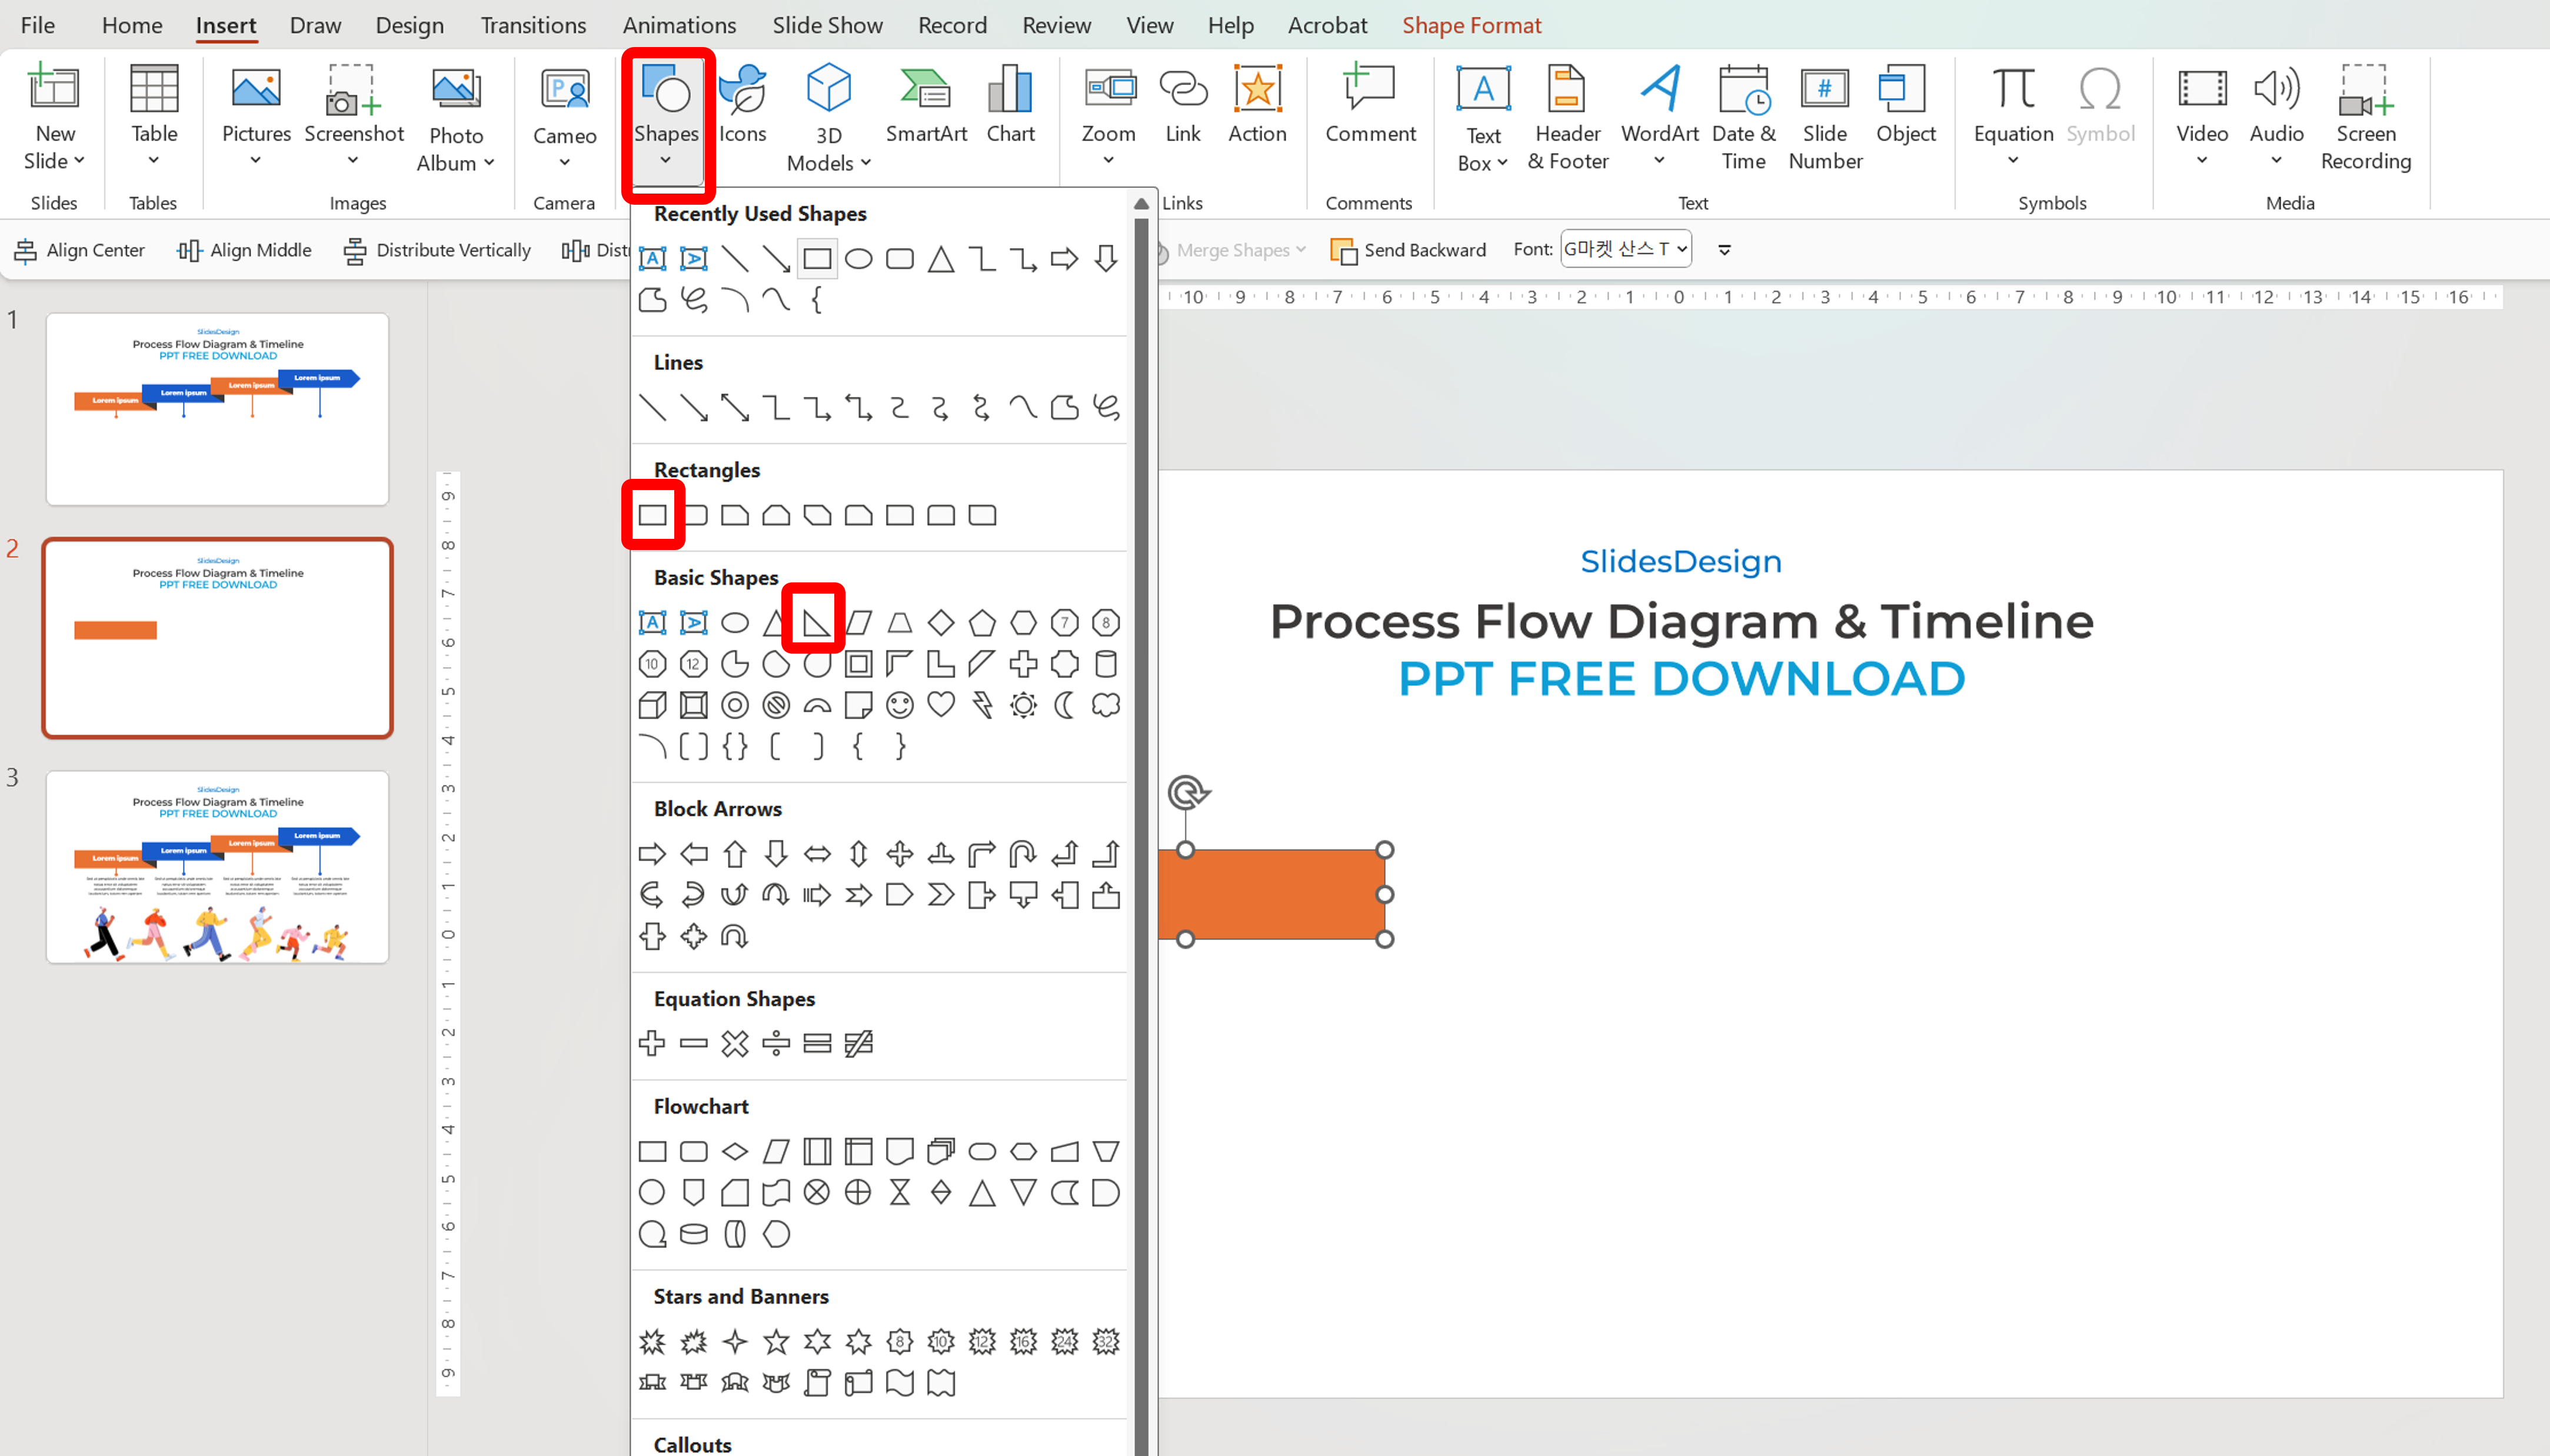
Insert a Table: Go to Insert → Shapes and create a Rectangle.
-
Add other shapes: Insert triangle and Pentagon on the right position.
-
Draw Connectors: Use Insert → Shapes → Line/Arrow each flow line.

-
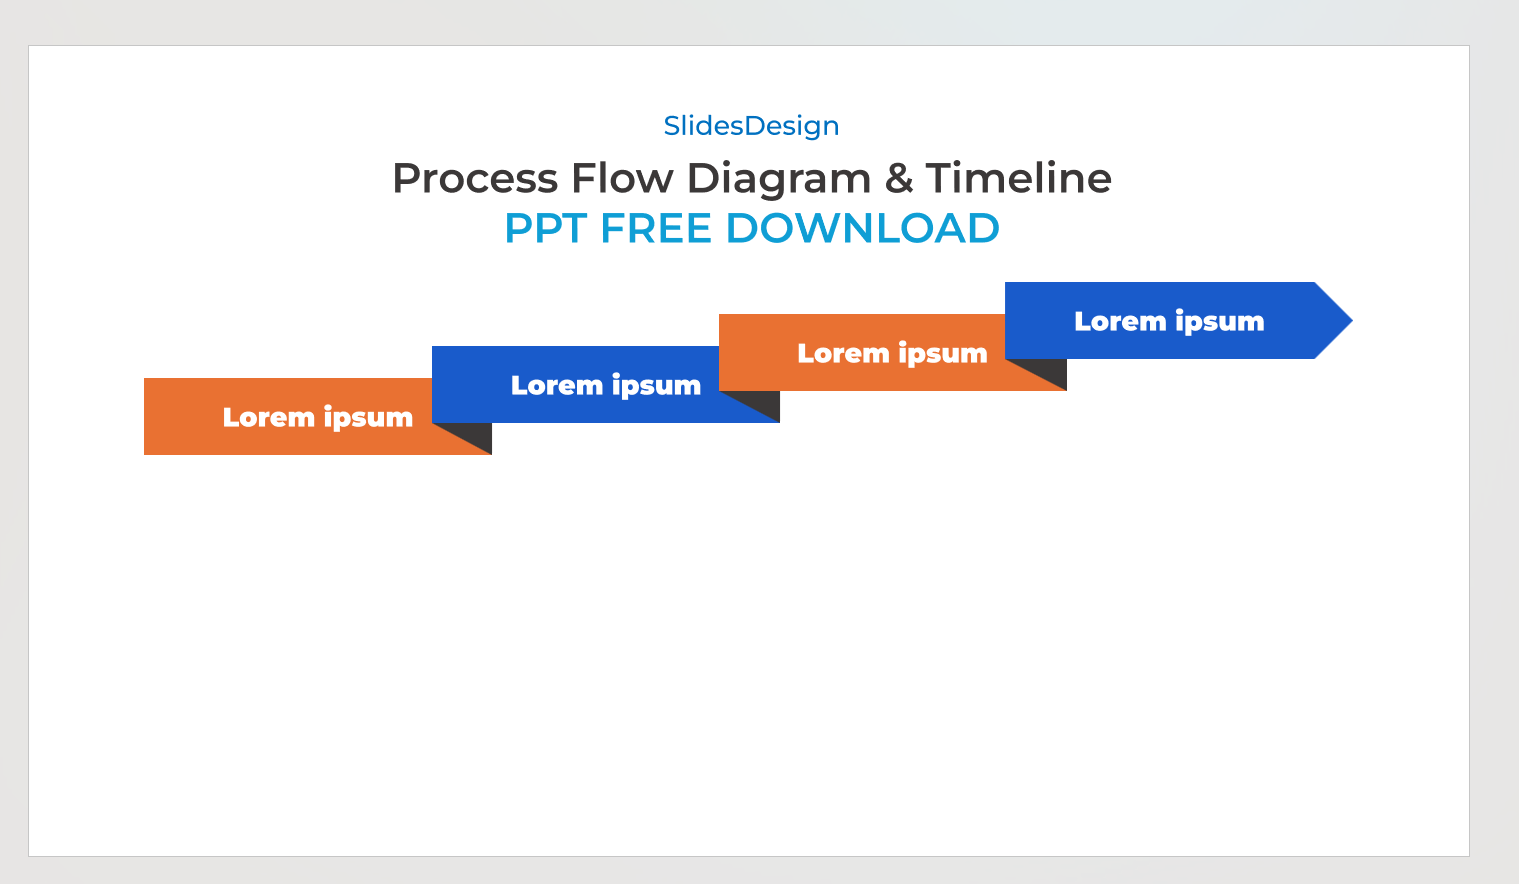
Customize Everything: Change colors, apply shadows, and add gradients for a modern look.
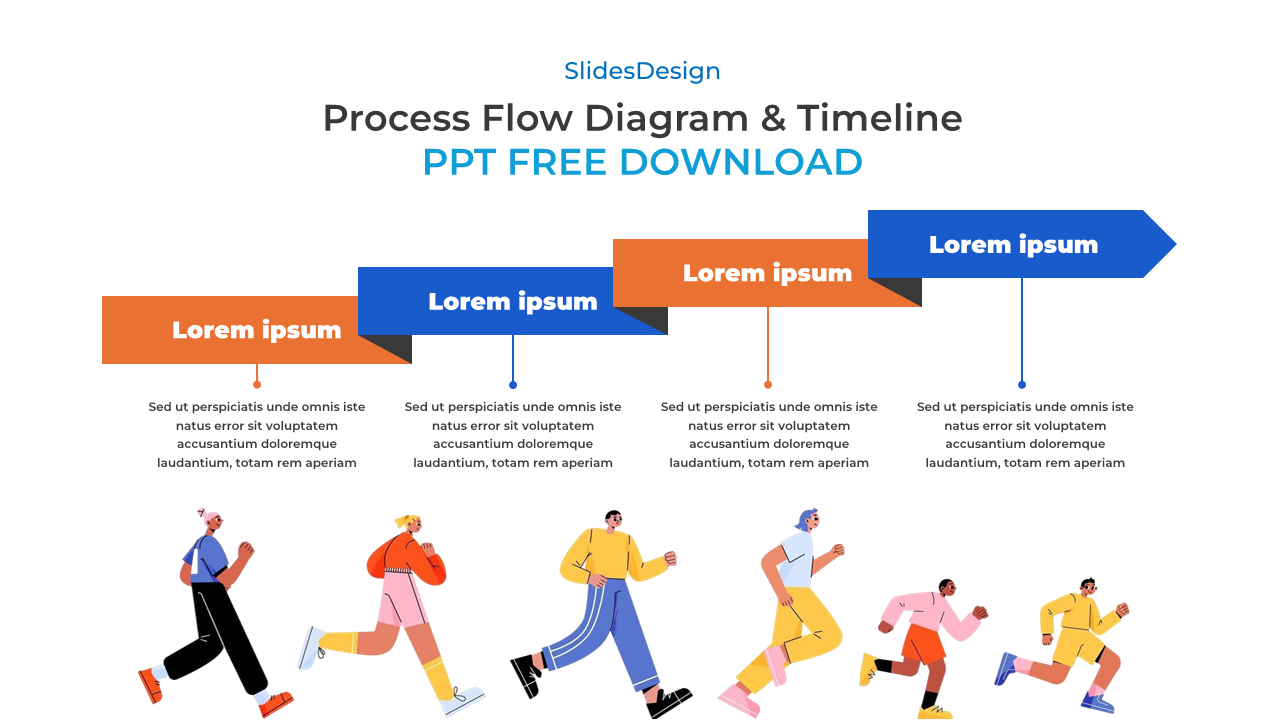
*You can download here for free
Step 5: Make Your Timeline Interactive
To create clickable milestones:
-
Right-click on a milestone → Hyperlink → Place in This Document.
-
Link it to a detailed slide.
-
Add a “Back to Timeline” button for easy navigation.
Tips for Designing a Stunning Timeline
-
Plan Before You Design: List all events and dates on paper first.
-
Use Visual Hierarchy: Highlight important events with larger icons or bolder text.
-
Leverage Templates: Start with ready-made PowerPoint timeline templates if time is tight.
-
Keep It Minimal: Too many elements can clutter your slide.
FAQ: How to Make a Timeline in PowerPoint
Q1. What is the easiest way to make a timeline in PowerPoint?
Using SmartArt → Process → Basic Timeline is the fastest and easiest method.
Q2. Can I create a timeline from scratch?
Yes! Use Insert → Table and Insert → Icons to create a fully customizable timeline.
Q3. Can I animate each step of my timeline?
Absolutely. Convert your SmartArt to shapes and use the Animations tab to make each element appear sequentially.
Q4. Are there free PowerPoint timeline templates?
Yes, many websites (including SlidesDesign) offer free, editable timeline slides.
Mastering how to make a timeline in PowerPoint is a must-have skill for anyone creating presentations. Start with SmartArt for quick timelines, or experiment with the custom table-and-icon method for a professional finish. With animations, interactive elements, and the right design, your timeline can become the highlight of your presentation.
If you want to get this tutorial diagrams? Check out the link below.
PPT Charts & Diagrams


